Friday, May 10, 2013
I'm Finally Back to Blogging
I know it's been forever since my last post. My daughter is now in Preschool and I have a been working full time for an internet company; in their warehouse. It has taken me 7 months to get used to being a full time working mom (hence the lack of posting) lol. I will start posting some of my garden tips and updates on my plants as they come out. I have been working on an english garden for years building it up from seedlings.....
Saturday, August 11, 2012
We Tryed a Homemade Laundry Detergent Recipe

The recipe goes as:
Use a cheese grater and grate an entire 4 ounce bar of soap.
Add 1 cup of washing soda.
Add 1 cup of borax.
Mixed together for 7 minutes, they said 5 but I found 7 was better for us.. And that's it you're done.
I also add 1 half cup of white vinegar to my fabric softener dispenser ( vinegar is a natural fabric softener)
I would really suggest visiting there site they have a lot of tips and a picture guide on making it step by step.
How To Make A Dress Up Closet From an Old Dresser
Hi!! I am so excited to show you how I made my daughters new Dress-Up Closet out of an old Boot Leg Dresser!!! This dresser was an Eye Sore in our small little apt.. I am so Happy to say BYE BYE to Eye Sore and Helllo Autumn's New Play Area!!!! I will be showing you step by step how I did this.
BEFORE AFTER


 Make sure to sand the whole "shell" inside and out.
 Step 12: Measure the dresser for the rod to hang the clothes on. I took one of Autumns little girl hangers and measured it.
 1 1/2" I wanted it to be easy for her to hang the clothes so I added another inch onto my measurement.
 Measure the inside to see if it is a good fit either add and inch or so..

 Take your measuring tape and line it up with the pencil marks on both sides, find the middle point. Mark it with a pencil. Mine was 16" wide so I marked at 8".
Step 13: Take a big dill bit the same size as your rod and drill on the center pencil marks on both sides of the "shell". Try to drill as straight as you can..
 For a rod I found an old Curtain Rod, But you can use anything you can make work like a broom handle and such.


Step 15: Grab a little Helper :), and put them to work. I used killz to prime it. I used a total of 3 coats of killz on the outside and 4 on the inside. My dresser was very dark though, if yours is a lighter color I am sure it will only take a coat or 2.


Step 16: I let my daughter pick out the paint color, And then she chose spray Paint in a candy pink. I don't like spray paint but I did put it in her hands so we went with the spray paint. (no I did not let her use it). Be sure if using spray paint to shake it for 2 min before spraying and every min for at least 12 seconds. Another tip I have for anyone using spray paint is to do the trim first then the center working the same directions either up and down or side to side. I bought 3 cans and I am glad I did, It took 3 coats to cover it. I did not spray paint the inside so if you plan on doing that double your spray cans.


Step 17: I painted the inside with 2 more coats of killz then after that was dry, I used a Gloss paint for the inside. 2 Coats was all I needed.
 First Coat Second Coat


 Step 19: I stapled the back after making sure that it was even on all side for ccoverage.
 Step 20: At the corners I gathered the material and cut it in a triangle to create the corner.

 Step 21: I put a staple at the top and then one at the bottom. So there was no open seams.

 Step 22: I then trimmed the tops so it was even with the side walls and then finished stapling top and bottom .

 The Reason I needed to make this!!! Over flowing dress up chest.
 Now she has something she can use without throwing all the dress up clothes about her room!!! YAY!!!!

I threw buckets in the bottom for accessories but I plan on making baskets from left over cloth scraps.... Well that's how I did it and I hope it helps you if you plan on making one. Some time within the next couple weeks I will post what I did with the drawers. I have a new niece and I am making my daughters clothes for school so hopefully by the end of august I will be able to get that post up.
I have found other cool Ideas on the internet and have pined then on my pintrest account.... http://pinterest.com/birchgoddess/
BEFORE AFTER


Step 1: Gather Ugly Dresser

Step 2: Take out drawers and set them aside (what to do with drawers is in my next blog)
Step 3: Knock out all the brackets( That hold the drawers up) on the front and on the inside walls with a hammer. Fun :)!!

Step 4: So now you should have s shell of a dresser I went and fixed some bits tat had came off as I was pulling off the front brackets... Wood glue and a clamp works wonders!!

My dresser was moddified at some point before it had come into my possesion to have a secret door in the back and a hidden compartment... When I Looked in the "shell" I found nail Sticking out everywhere!!! So I covered them alll up with some of the brackets I had just taken out. ( If I had tryed to take all the nails out the dresser would have fallen apart on me).
Step 5: Search for all nails that are sticking out!!
Step 6: Find bits of wood that will fit to cover your Nails if taking them out will damage your dresser. I used The brackets from the dresser.

Step 7: Dill holes in the wood with a drill bit slitly smaller in width that the screw you plan on using. Also make sure that the screw that you use is long enough to go threw the bracket and half way threw the peice of you you are trying to cover but not so long that it comes out the back side.

Step 8: Screw in the brackets over the exposed nails..

Step 9: Take off the secret door (I find it unlikely you will have to do this step but I wanted to add it anyway just in case).


Step 10: Sanding!!! I used a hand sander at first but it wasn't getting threw the varnish... so I switched to this baby!!!! Hand sanding will do just fine also if you want. But I have a 4 year old so time is of the essence. You only need to get all the shine off so the primer will stick.


 Make sure to sand the whole "shell" inside and out.
Step 11: Get all the glue off the inside with a screw driver... with just a little force knock your screw driver at the side edge of the glue and it should come right off.

 1 1/2" I wanted it to be easy for her to hang the clothes so I added another inch onto my measurement.
  Measure the inside to see if it is a good fit either add and inch or so..
I then Measured 2 1/2" on both sides of each side of the dresser and marked each with a pencil.
 Take your measuring tape and line it up with the pencil marks on both sides, find the middle point. Mark it with a pencil. Mine was 16" wide so I marked at 8".
I then Measured 2 1/2" on both sides of each side of the dresser and marked each with a pencil.
Step 13: Take a big dill bit the same size as your rod and drill on the center pencil marks on both sides of the "shell". Try to drill as straight as you can..
 For a rod I found an old Curtain Rod, But you can use anything you can make work like a broom handle and such.
When you have drilled both holes you should not have any problem putting the rod threw...

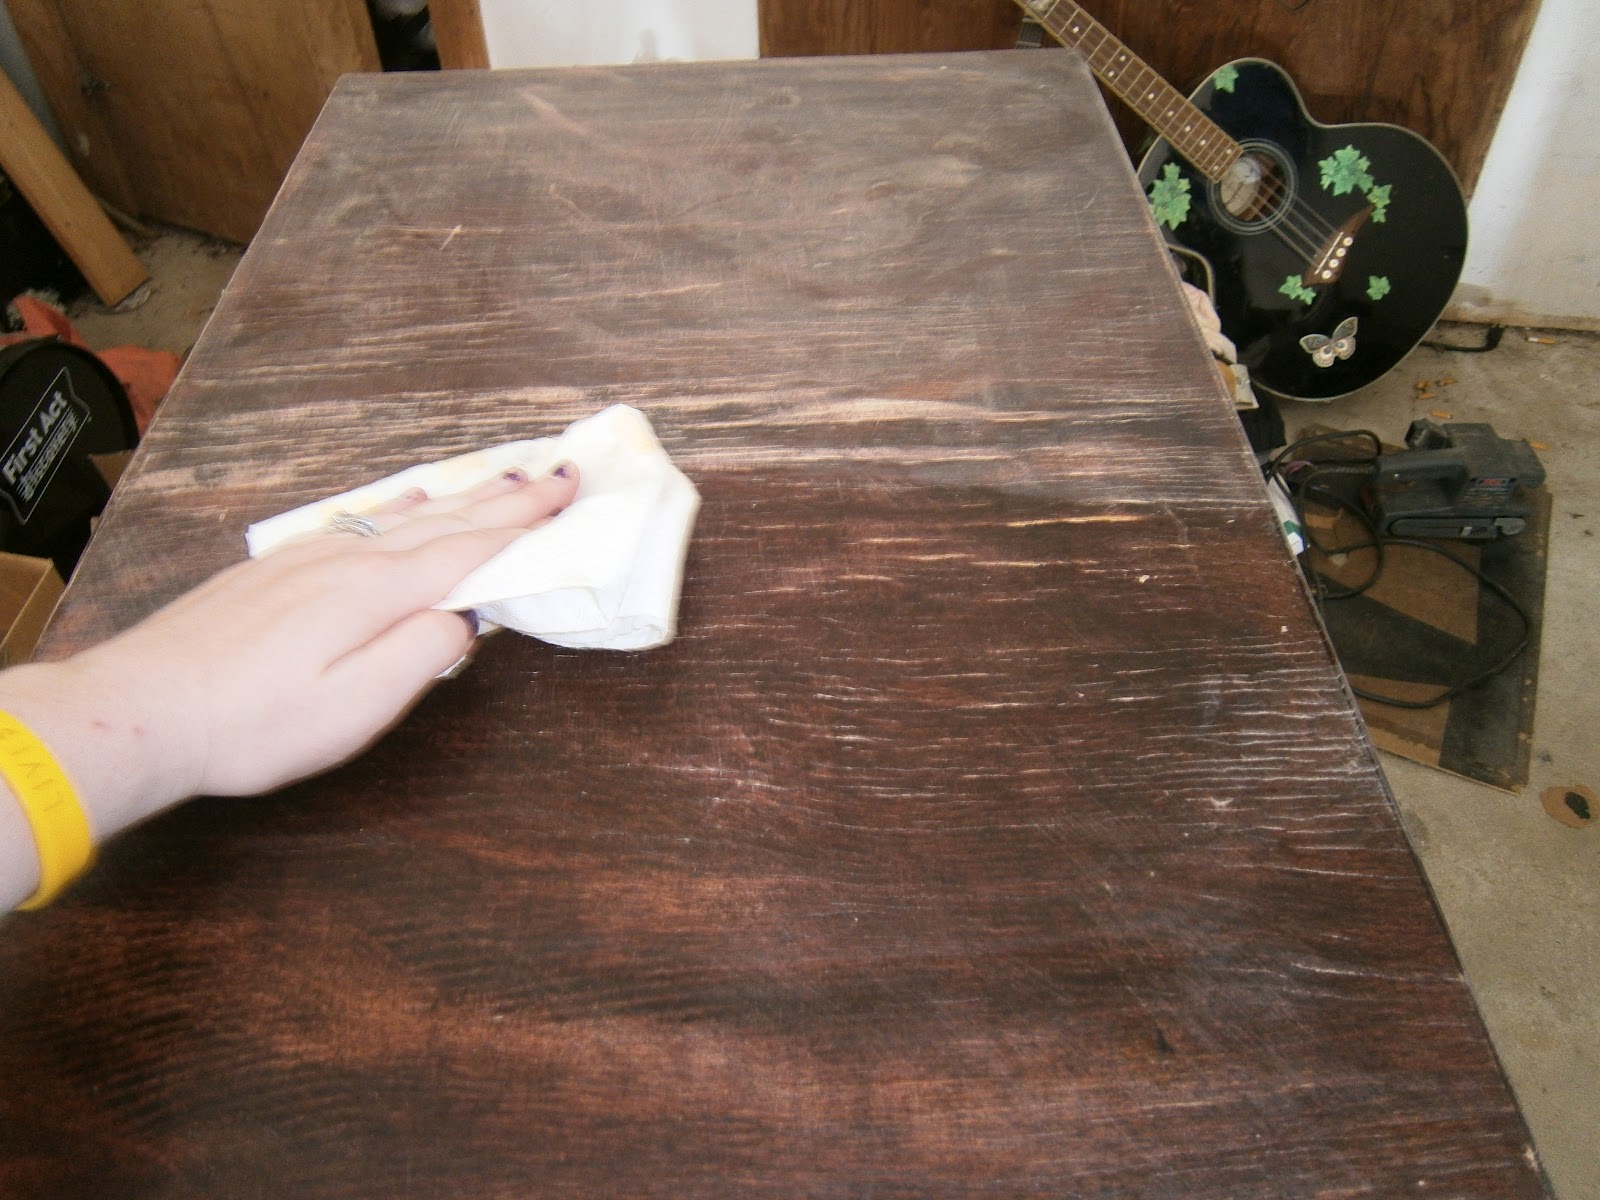
Step 14: Wipe down the outsides and insides with a wet cloth or paper towel to get all the dust off . Then vacuum out the bottum and crevices.

Step 15: Grab a little Helper :), and put them to work. I used killz to prime it. I used a total of 3 coats of killz on the outside and 4 on the inside. My dresser was very dark though, if yours is a lighter color I am sure it will only take a coat or 2.


Step 16: I let my daughter pick out the paint color, And then she chose spray Paint in a candy pink. I don't like spray paint but I did put it in her hands so we went with the spray paint. (no I did not let her use it). Be sure if using spray paint to shake it for 2 min before spraying and every min for at least 12 seconds. Another tip I have for anyone using spray paint is to do the trim first then the center working the same directions either up and down or side to side. I bought 3 cans and I am glad I did, It took 3 coats to cover it. I did not spray paint the inside so if you plan on doing that double your spray cans.


Step 17: I painted the inside with 2 more coats of killz then after that was dry, I used a Gloss paint for the inside. 2 Coats was all I needed.


Step 18: I needed Padding for the bottom because I had to put in those brackets to cover the nails that were sticking out. (mommy vision, I saw here falling into the thing and getting hurt on the brackets lol) I found an old shag carpet that was washed to it was all clumpy, knowing it was never going to be used for anything else I decided perfect for the bottom of the dresser. First I put the Rug in the bottom.


Step 23: Step Back and see what you have created!!!! :)


I threw buckets in the bottom for accessories but I plan on making baskets from left over cloth scraps.... Well that's how I did it and I hope it helps you if you plan on making one. Some time within the next couple weeks I will post what I did with the drawers. I have a new niece and I am making my daughters clothes for school so hopefully by the end of august I will be able to get that post up.
I have found other cool Ideas on the internet and have pined then on my pintrest account.... http://pinterest.com/birchgoddess/
Tuesday, July 17, 2012
 Hello Everyone!!! This is my first Blog, I am so excited!!! So, I guess I will start off with a little bit about myself.... I am a stay at home mom with my Daughter Autumn who is 4..... I am 26 and I have been married twice.... My Husband Now has been my best friend since I was 16, We just got married in April.... So, Guess I will jump right into it now that you know a little bit about me..... Last night I was looking at my favorite pair of wedges and hating the fact that I couldn't wear them anymore because of a broken strap..... I was done waiting for the perfect floral fabric to show up (miracles do happen, but not this time) so I decided It was going to happen tonight..... I went over to my mothers (also a crafty mom) and asked if she had any floral fabric and I look down at her and right there under her arm was a new pillow she had just made to cushion her arm while playing EQ2..... It was of beautiful Blue and White Floral.... She said she had 2 small pieces of scrap left sooooooo.... I took both and went back to my house..... I gathered my Fabric Glue and an old pillow case, oh and my hubby he had to take the shoes apart for me..... so ..... the old straps were still intact (but the glue that was on one of the straps had failed and the strap came out of the shoe which is why I had to fix it but decided to wait till I had floral fabric because I wanted floral fabric shoes) So back to the story now I guess........... The Straps were a dark navy blue with leather inlay on the top, which would show right threw the cotton floral fabric..... So I took the old white pillow case and wrapped it once around each strap and glued it on the side facing my foot and smoothed it out the surface of where the glue was.... The I did the same with the floral fabric, Then Glued the whole shoe back together.... YAY!!! These were Fun and I am so happy that my idea worked.... and I love how they came out.....
Subscribe to:
Comments (Atom)